IK experiments
Pierre Terdiman
June 24, 2007
I recently bought “Tomb Raider Anniversary” on PS2, and as soon as I started playing I noticed that the weird IK bug from “Tomb Raider Legend” was still here. In Legend I thought they simply ran out of time and could not fix it before the release. But they did get enough time to fix it in the new game, didn’t they? So I wondered if there was some technical problem I could not imagine here. And, well, one thing leading to another, I eventually added a complete IK system to “Konoko Payne” (KP).
In Tomb Raider, the “IK bug” looks like this: when Lara stops with one of her feet penetrating the level (say a rock or something), the IK doesn’t start immediately and the foot goes through the geometry for a noticeable amount of time. Then the IK suddenly kicks in and the leg’s pose is immediately corrected, without motion blending. Visually Lara changes from the non-IK-corrected to the IK-corrected pose in one frame, which of course produces a bad looking hiccup.
I tried to replicate (and fix) this bug in KP. So, the steps were:
- implement an IK solver
- figure out when to apply IK
- figure out how to use the results in a visually pleasing way
1) The IK solver
As far as I know there are three main ways to do IK in games, from the most simple to the most complex:
- using a 2-bones analytical solver
- using an iterative CCD solver
- using a physics engine
I will not go into the details of those. Jeff Lander already covered the two first solutions years ago in Game Developer Magazine, and using a physics engine was way too overkill for my simple goals here. I need IK in three places in KP:
- to stick the character’s feet to the ground
- to stick the character’s hand to a riffle
- to make sure the character really grabs NPCs in correct places during throws
In other words I only need to apply IK to a character’s legs and arms. For this, a 2-bones solver or a CCD solution should work equally well. I used a CCD algorithm because I already had the code available in ICE. The usual difficulty with the CCD approach is to find a good (valid) initial configuration. But since we only want to apply IK to an already existing motion, in order to improve its visual quality a bit, we already have a good initial pose: whatever comes out of your character animation system. It makes using the CCD approach very easy.
2) When to apply IK
Let’s discuss this for the legs.
It is a bad idea to apply IK for the legs all the time: you obviously do not want the character’s feet to stick to the ground at any given frame. For example it is obvious that the foot should not be locked to the ground in a kick animation. But the same is true for the walking & running animations as well: for some frames, the foot should be free to leave the ground. So I ended up defining some IK time segments for each animation. It looked like this:
Motion name CSID Start End
IK Idle1 65 0 1000
IK Idle1 84 0 1000
IK RunFWLeft 65 0 8
IK RunFWLeft 84 16 1000
IK RunFWRight 65 16 1000
IK RunFWRight 84 0 8
For a given motion, the following IK parameters are defined:
- CSID: this is a “Character Studio ID”, as exported by Flexporter. This is simply a unique ID for each bone of a Character Studio hierarchy. 65 and 84 are values for the left and right foot.
- “Start” and “End” are starting and end frames, defining when the IK should be applied
So for example the first two rows say that IK should always be applied during the “Idle1” motion, for both feet. “1000” is an arbitrary value, large enough to cover the length of any animation.
The running motion is made of two connected motions, RunFWLeft and RunFWRight. And for example the left foot (65) is only marked for IK between frame 0 and 8, and then 16 and 1000. Otherwise it is not constrained.
Note that this format is completely temporary; I just wanted something to test IK quickly. Also, IK data got defined for more motions than this. Defining IK intervals for each animation is tedious, but not more than what we already define per-motion in KP. Anyway, enabling IK for only the idle, walking and running motions gives you 90% of the effect. It is not so important to use IK on other moves (like punch, kick or attack moves) because they are usually so fast that you do not really notice the lack of IK there.
Using the data is a simple matter. At runtime, if we are in an “IK frame”, the foot must touch the ground. We start from the foot position and find its correct position on the ground (which can be either below or above the current one) using a raycast. Then this position is used as the target for the IK solver. If we are not in an IK frame, we still want to apply IK anyway if the foot penetrates the ground.
3) Using the results
The IK solver is applied after the usual motion blending from the character animation system, and of course before the rendering. The ICE character animation system outputs poses (a translation and a quaternion) in both local and global space. Conversion to world matrices is only performed later in the pipeline.
The IK solver outputs new positions and directions for each bone. The direction is expressed as a 3D vector, not as a quaternion or a matrix. Figuring out the correct rotation matrix for each bone after the IK step was not completely obvious. I tried various approaches that did not work. In the end I got the best results by re-using part of the initial rotation matrix M for each bone (the one out of the character animation system). In short, the IK solver gives you one row for the final matrix, while the two other rows are derived from M. Computing an arbitrary basis out of the IK axis, without using more information, simply did not work for me. Anyway this is easier to understand by looking at the code:
static void ComputeMatrix(Matrix3x3& dest, const Matrix3x3& src, const Point& dir)
{
const Point& Row0 = src.GetRow(0);
const Point& Row1 = src.GetRow(1);
const Point& Row2 = src.GetRow(2);
Matrix3x3 FromTo;
FromTo.FromTo(Row0, dir);
dest.SetRow(0, dir);
dest.SetRow(1, Row1 * FromTo);
dest.SetRow(2, Row2 * FromTo);
}
“src” is the source matrix M, from the character animation system. So this is how the bone is oriented before IK is applied.
“dir” is the orientation for this bone, after the IK is applied. So this is the direct result of the IK solver.
“FromTo” is a small piece of code computing a rotation matrix mapping a source vector to a destination vector. It is somewhat well known, you can grab the code on Tomas Möller’s website.
So instead of trying to derive the two last rows out of nowhere, we reuse the rows from the initial pose, which works much better.
Finally, and I think that’s what Tomb Raider failed to do, the newly computed poses must be blended with the initial ones. This is easy enough and without issues (lerp+slerp as usual). I did the blend in world space because it was easier. It is kind of bad in theory, but so far it worked well. In any case it looks a lot better than without blending (which looks exactly like the Tomb Raider bug).
4) Extra notes on IK and the character controller
The character controller (CCT) is the module moving the character around the level. It typically uses a swept box or a swept capsule around the player.
But with IK available, the way we move the (visual) character according to the CCT position is not always good. When there is a small bump, the CCT volume moves over it and goes up & down a little. In the real life however, the character would cross over the obstacle but his overall height would still be the same (unless he really climbs on purpose on the obstacle with his two legs, but here we are in the context of a walking / running animation)
So the proper way to do that would be to run the CCT through the obstacle, and let the IK code fix the leg positions.
We may also want to desynchronize the visual position from the CCT position, because the character really isn't a capsule or a box. So for example when we are climbing a slope, the center of the box / capsule does not really touch the slope (contact happens on the edge of the volume instead). So when we stand still (idle pos), the bottom of the feet = the bottom of the CCT volume, which doesn't actually touch the mesh (so we are floating a bit). We can not fix that by using a fixed offset between the two volumes, because the offset depends on the underlying mesh. For example if we are standing on a flat plane, a null offset is actually correct. So it seems what we need is a raycast from the bottom of the volume to the underlying ground mesh. Note however that this raycast should be deactivated when the character jumps. It could be reused for several other things, e.g. portal updates.
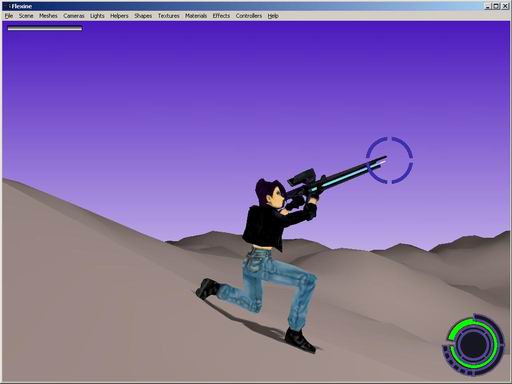
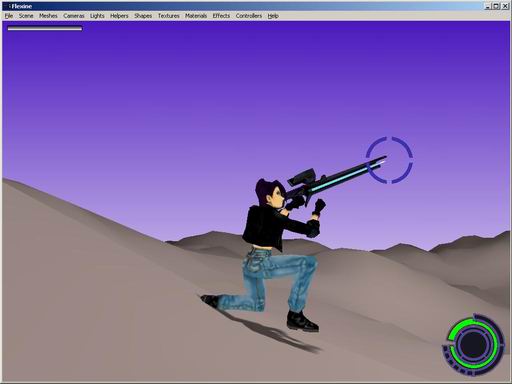
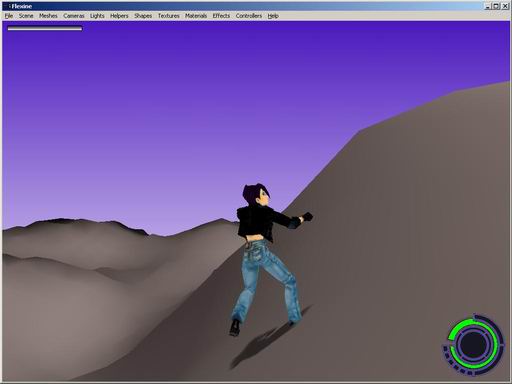
Here are some results:
Bumpy terrain, IK for legs & arm
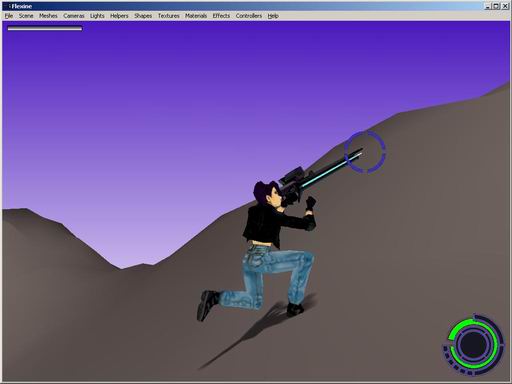
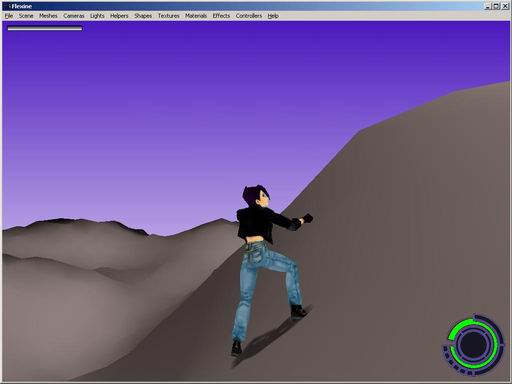
Steeper slope, IK for legs & arm
5) Future work
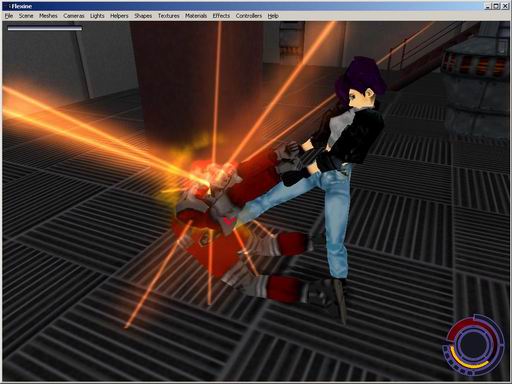
The next step is to use IK in “throws” animations, where the player and the opponent interact closely, in more complex sequences than simple walking animations. There is usually a “throw” animation for the main character, and a corresponding “throw target” animation for the opponent. The problem is that the same target animation is reused for all enemies in the game (at least it was like this in ONI). Those enemies vary in size and height, and sometimes the single reused target animation does not match the actual target very much. In this case, it would be useful to fix the animations at runtime using IK. This example shows a “back breaker” attack, where IK could be used to make sure that Konoko correctly grabs the enemies’ hands, and also that her foot is correctly located on the opponent’s back. This is what I will try next.
(to be continued)